Here we’ll list the steps you’ll need to enable authentication using Amazon accounts with FileMaker Cloud.
If you’ll be having more than a few different people logging in to the Admin Console of your FileMaker Cloud server, it’s generally good practive to avoid having everyone use the same credentials. By enablling an additional authentication mechanism, you can easily add or remove administrative access to a server, and user’s get to use their own own credentials.
First step in enabling this is to log in to your server and go to the Passwords and Users panel on the Configuration page.

Near the middle of this screen, you’ll see the link for signing in to the Amazon Developer App Console. Clicking on this will open its page in a separate window. After signing on with your AWS credentials, you may see a screen asking for more details about your company, so complete that if necessary.
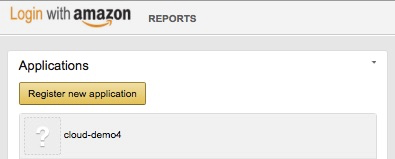
You should then see a button were you can see a list of any existing registered apps. Click the Register new application button to get to the next screen we need.
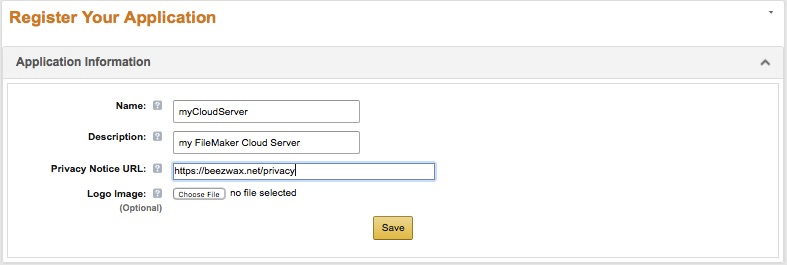
You can now enter the web app’s name and description. These are just for your reference. A required field (even though not relevant to a FileMaker Cloud server) is a link to your company’s privacy statement.
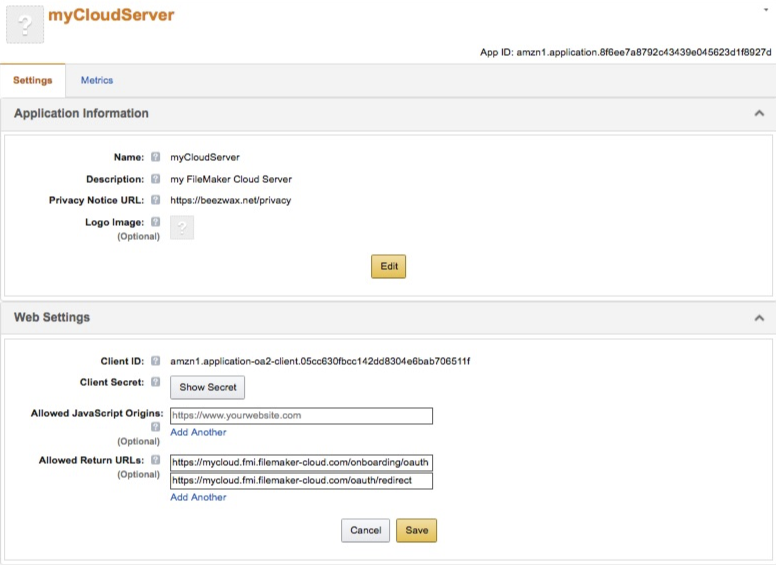
After clicking Save, we see some additional fields. We’ll have to copy some values back and forth to get both the FileMaker Cloud and the Web App configuration set.
I’ve already entered the Return URLs here, which I got from the FileMaker Cloud configuration (see next screen shot).
Back in FileMaker Cloud, we need to copy the Client ID and Client Secret into FileMaker’s configuration.
Now save the configuration in FileMaker Cloud, and likewise in Amazon’s Developer App Console. If all this worked out, when you log out of FileMaker’s console you’ll now see a Login with Amazon button at the bottom.

Next, we need to add some users in. You’ll need the email address of each user — the same one they use with their Amazon store or AWS.
Back in the Passwords and Users screen, click the Add Amazon Authenticated User button, and enter the user’s email in the dialogue.

Shortly after clicking OK, you should see this:

If the email was really received, the user will get a message with the subject “Welcome to FileMaker Cloud”, and in the body of the message a link to verify the account.
If the email address was incorrect, or you want to remove access, click the Remove button to the right of the email, then click OK on the resulting dialogue.

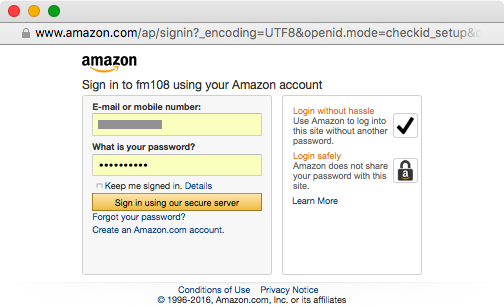
Once a user has verified their account, they can now click the Login with Amazon button on the main login screen. They’ll get a new window with a fairly generic Amazon login page.
When the Sign in button has been clicked the window will close and the parent window will proceed to connect them to the server’s dashboard.
References