Recently, I needed to revert a database file hosted on a FileMaker Cloud 16 server. Due to a problem I was having with the Download function however I had to take a different route from the usual method.
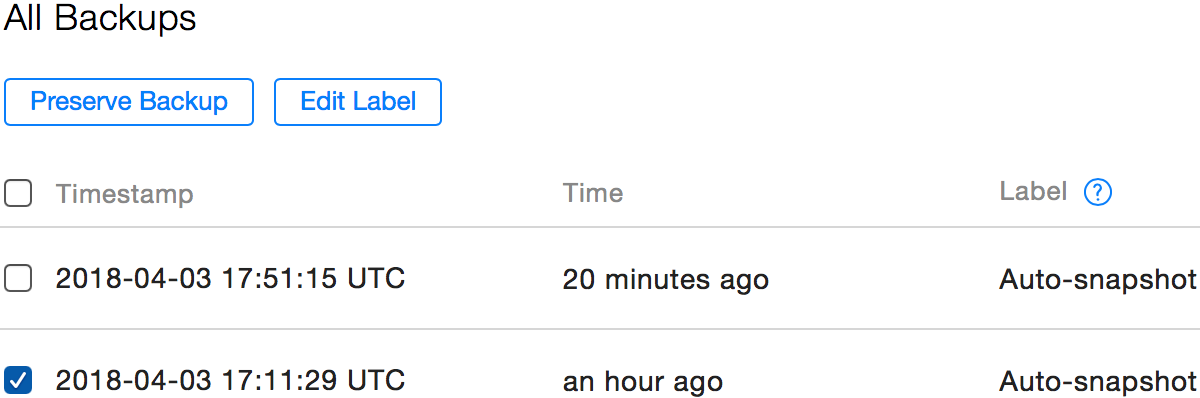
The first steps in this process went normally. After I determined which backup was the best available, I marked it to be preserved by checking the backup and clicking the Preserve Backup button.
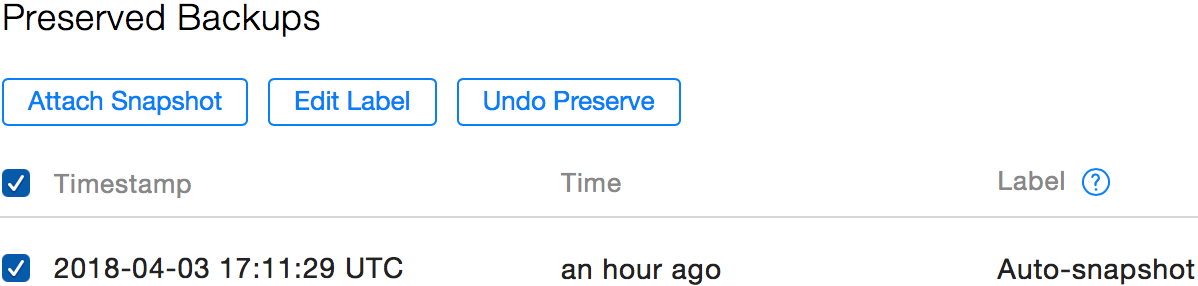
My selected backup was then listed under the Preserved Backups panel, where I attached the backup copy to the server using the Attach Snapshot button.
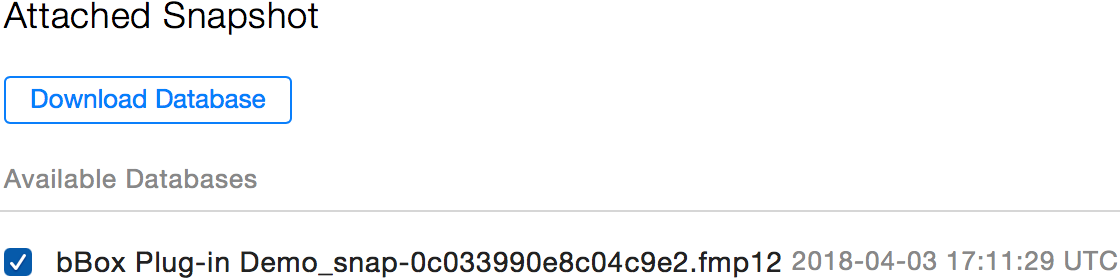
After asking it to attach the backup, you should then get a message saying this is in progress and to allow some time for processing. Once that is complete, I’ll go to the Attached Snapshot panel to select the file to restore.
Here’s where things started to go astray. Normally after clicking the Download Database button I’d get one, then two notifications about the file being restored.
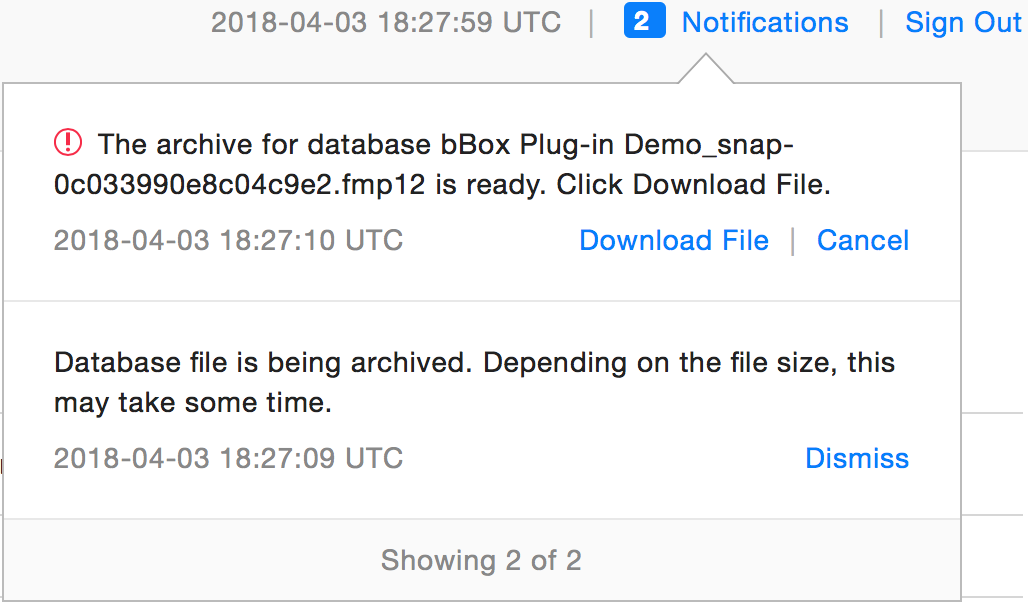
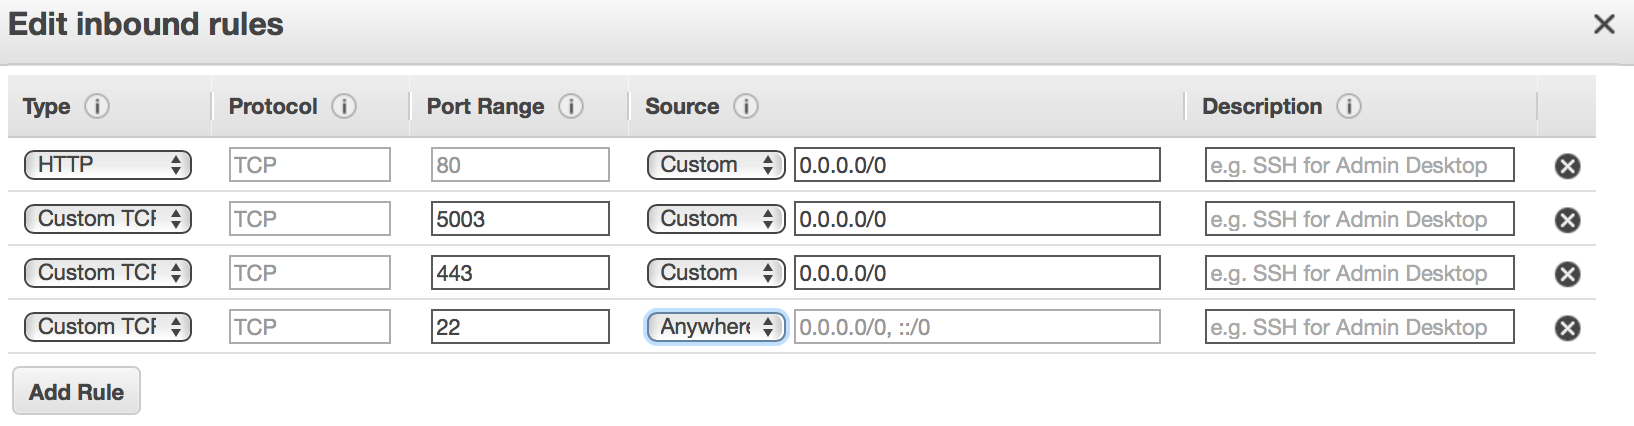
Unfortunately, that never happened in this case. After trying a couple other browser versions to no avail, I chose a different path here to get to my backup. Before this can be done however, you’ll need to temporarily modify your server’s Security Group settings in the AWS control panel. We need to do this so that we can connect to the server using SSH, and SSH connections are blocked by the default security group settings.
After first logging in to the main AWS dashboard, select the EC2 section. Make sure you are in the correct availability zone for your server (top-left) when you do this.
Once there, you should see a list of your servers. Select the one you want to modify, and down below you should see some details come up in the Description tab.
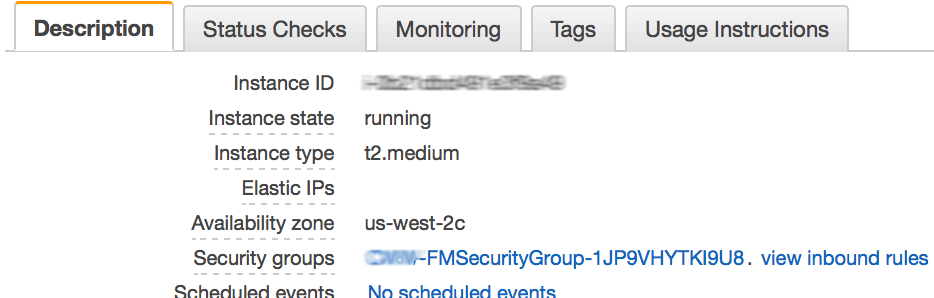
Click on the name of the security group to jump to its settings. Here we can modify its inbound rules to allow our SSH connection.
Before I can connect, one more thing is needed. When the FileMaker Cloud server was first created, I had to either create a new key pair, or assign an existing one to the server. When the key was created, you should’ve downloaded a copy, and I’ll need that key as a local file before I can connect. If you’ve lost this there is a way to reset things, but I won’t be covering that here.
Now we can finally connect to our server. Open up a Terminal window (on Windows you’ll need to install an SSH client like PuTTY) and connect to the server using the SSH command, where the path to the key file and the server’s hostname are its parameters:
ssh -i ~/filemaker_server.key centos@my.serverdomain.com
Now that I’m connected to the server, let’s change to directory containing the attached backups and see what’s there:
[root@ip-172-31-18-151 ~]# cd /media/Data/Databases
[root@ip-172-31-18-151 Databases]# ls -l
total 125148
drwxrwxr-x. 3 fmserver fmsadmin      4096 Apr  2 08:02 RC_Cache_FMS
drwxrwxr-x. 3 fmserver fmsadmin      4096 Apr  2 19:46 RC_Data_FMS
drwxrwxr-x. 2 fmserver fmsadmin      4096 Mar  5 22:37 Removed_by_FMS
-rw-rw-r--. 1 fmserver fmsadmin 128135168 Apr  2 11:02 myDataFileName_snap-02039561eef11b737.fmp12
Here I verify that this is really the file I want to replace the hosted file with. The timestamp should around when the backup was made. In this particular case, I don’t have to worry about any external container data, and I’ve previously closed the hosted database file on the server. To replace the current version with the backup I’ll copy the file into the directory of the hosted file:
[root@ip-172-31-18-151 Databases]# cp -p myDataFileName_snap-02039561eef11b737.fmp12 /opt/FileMaker/FileMaker\ Server/Data/Databases/myDataFileName.fmp12
cp: overwrite ‘/opt/FileMaker/FileMaker Server/Data/Databases/myDataFileName.fmp12’? y
With that done, I go to the FMC admin console and open the file, and the users are back in business!
Simon